July 14th, 2026 at 3:30 PM
How To TutorialsCastmagic has become one of my favorite tools for speeding up my content workflow. If I have already recorded a video, I do not want to spend the next stretch of my day manually building titles, descriptions, timestamps, transcript files, post copy, and all the extra little pieces that slow everything down.
That is exactly where Castmagic fits in.
For me, Castmagic is the push button solution that takes a finished recording and turns it into usable content assets in minutes. If you are a YouTuber, podcaster, or anyone building a repeatable publishing system, this kind of automation can save a serious amount of time.
I am not talking about replacing strategy. I am talking about removing the boring parts that eat up your workflow.
Step 3: Let Castmagic generate the first draft of everything
Step 4: Review the transcript and assign the speaker correctly
Step 7: Refine the prompts so Castmagic uses the right keyword
Step 8: Generate multiple title options instead of settling for one
Step 11: Turn the last part of your workflow into simple copy and paste
Before I ever get excited about a software product, I want to know where it fits in my system. There are plenty of AI tools out there. You have general purpose tools that can write, summarize, brainstorm, and help with prompts. Those are useful, but YouTube and video publishing need a workflow that is much more specific.
That is why I look at Castmagic differently.
I already know the steps I need after recording a video:
Get the spoken content turned into text
Create a usable title
Build a description
Generate timestamps
Export caption files
Create supporting post copy
Move everything into upload mode fast
Castmagic works because it supports that exact process. Instead of bouncing around between multiple tabs and tools, I can keep most of the heavy lifting in one place.
If you are still piecing together your repurposing process, I covered a broader strategy in this article on repurposing content. Castmagic fits beautifully into that bigger system.
Once my recording is done, I head into Castmagic and choose the right workspace. In the platform, those are called spaces. I like that because it keeps projects organized, especially if I am producing different types of content.
In my case, I selected my review space and imported the video file directly from my computer.
One thing I appreciated right away was the upload speed. I often work with 4K files, and those are not tiny. Even with a 12 to 13 minute 4K video, the upload felt quick enough to keep momentum moving.
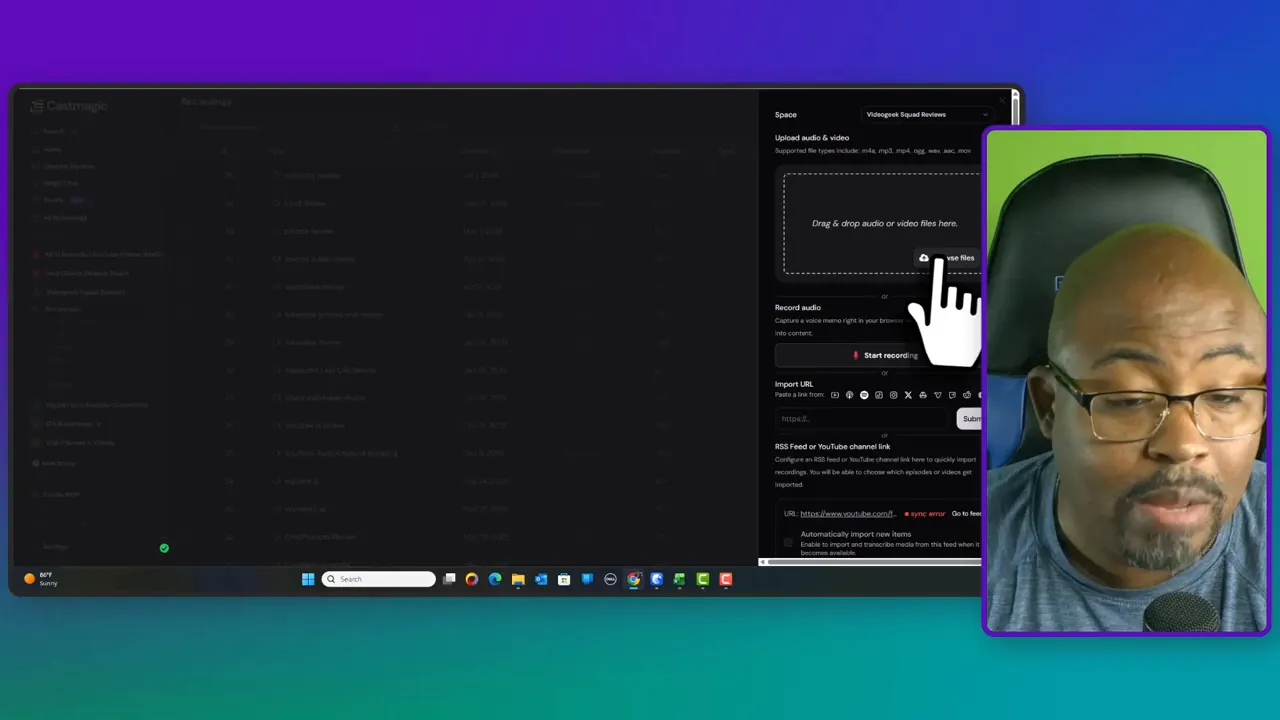
That matters more than people realize. When your workflow has too much friction, you start putting off publishing. The easier it is to move from recording to finished assets, the more consistent you can be.
After the upload finishes, Castmagic begins processing the file. This is where the platform starts earning its keep.
It can generate:
Video titles
Description copy
Hashtags
Keywords
Timestamps
Transcript text
SRT captions
Social and community style post copy
That is a lot of output from one upload.
I like tools that reduce my work to copy, paste, review, and publish. Castmagic gets very close to that. The real time saver is not just that it writes. It is that it writes multiple assets tied to the same source content.
Instead of opening separate tools for captions, summaries, title ideas, and social copy, I can get a stack of usable material from one file.
If you care about YouTube publishing efficiency, that is a major advantage.
Once the transcription is done, I always give it a review. Even when AI is strong, I do not skip quality control.
If you are the only person speaking, assign the speaker correctly across the file. That helps keep the content organized and makes cleanup easier. Castmagic also breaks the text into readable sections, which makes the review process smoother than staring at one giant wall of text.
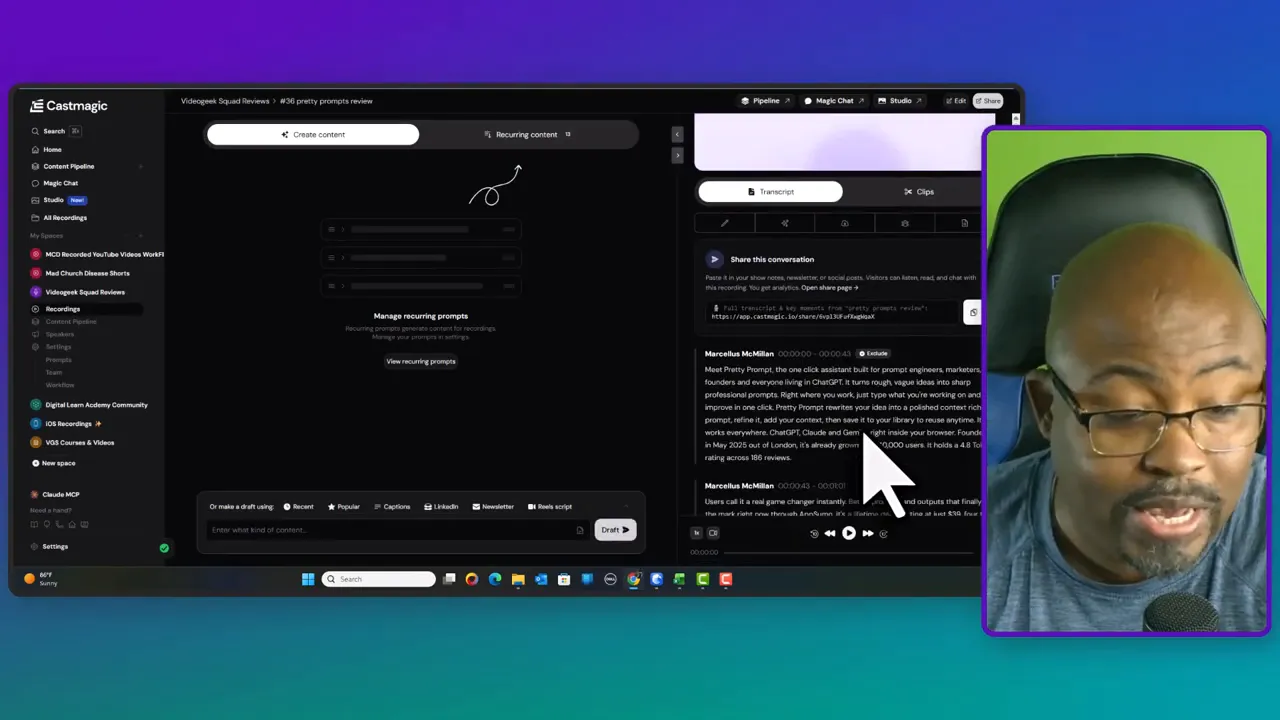
During this pass, I am mainly checking:
Names of products
Brand spelling
Special terms
Any obvious recognition mistakes
This is important because the transcript feeds everything else. If the source text is messy, some of the generated assets can inherit those mistakes.
Castmagic also gives me the option to export the text file with timestamps. That becomes useful later for documentation, blogs, editing references, or content repurposing.
After I confirm the content looks good, I download two things immediately:
The text file
The SRT file
The text file gives me a clean written version of the content, and the SRT file gives me caption data with timing attached.
I do not treat that as optional.
Captions matter for accessibility, organization, and publishing flexibility. If you use YouTube regularly, you already know that supporting files like this can make a big difference in polish and usability. I go deeper on platform side publishing details in this walkthrough on uploading an SRT file and video.
So even though Castmagic handles the automation, I still make sure I save those assets locally as part of my content archive.
One feature I really like is the find and replace function.
If a product name is spelled wrong across the file, I do not want to hunt through every paragraph manually. I can search the incorrect term, replace it once, and move on.
That sounds simple, but it is one of those little quality of life features that keeps the workflow fast.
When I am processing recurring content, I want small corrections to take seconds, not ten extra minutes.
That is also one reason I think Castmagic works well for repeat publishers. You are not just getting AI output. You are getting a usable editing environment around that output.
This is where I make Castmagic work harder for me.
Even though the first draft is good, I still like to refine individual outputs by telling the platform the exact keyword or phrase I want emphasized. In my example, I adjusted the prompt so the software clearly understood the focus of the review.
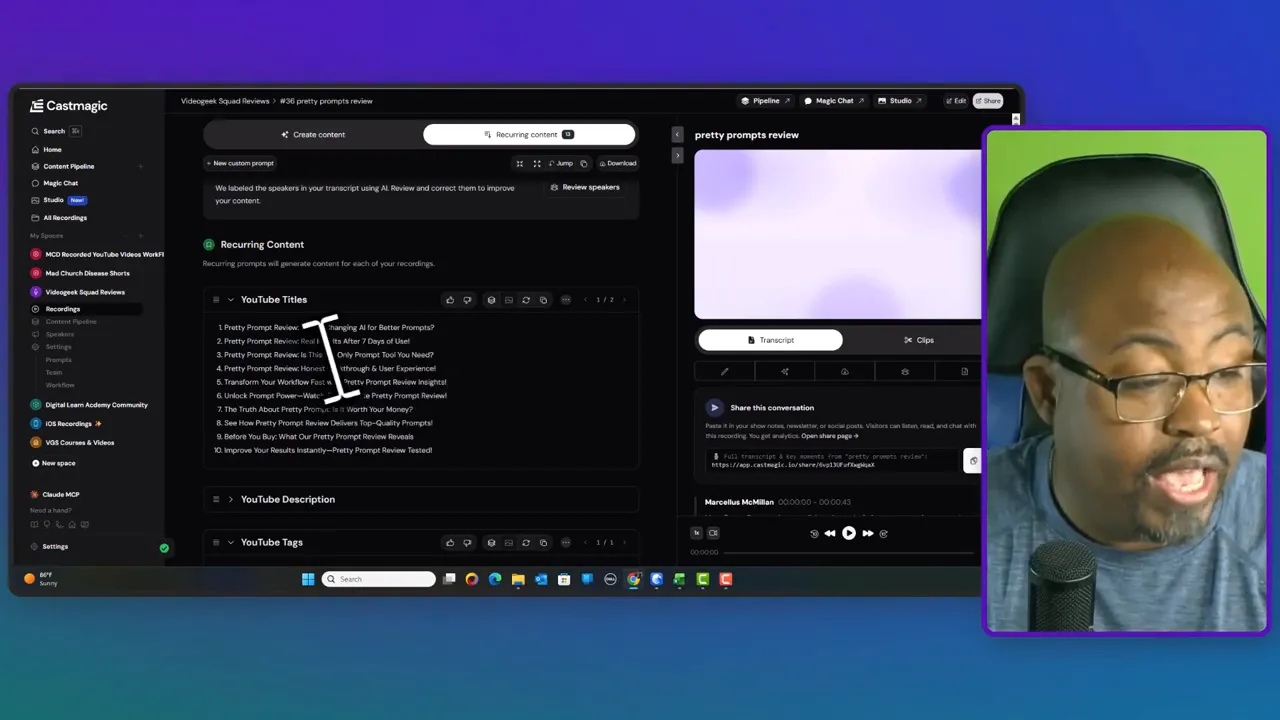
I do this for things like:
YouTube titles
YouTube descriptions
Pin comments
Timestamps
Social posts
The reason I like this method is simple. I do not need to overbuild my prompts upfront. I can let Castmagic generate the first pass, then make quick keyword adjustments where needed. That is faster than trying to engineer every detail before the content is processed.
If you want stronger performance on YouTube, metadata matters. Titles, descriptions, and keyword positioning all play a role in discoverability. I also talk more about that in this metadata article.
One of the biggest wins inside Castmagic is that it does not leave me with a single title and tell me to accept it. I can get a list of options.
That matters because title selection is strategic.
Sometimes I want a clean review title. Sometimes I want something more benefit driven. Sometimes I want a title that can score better in another YouTube optimization tool.
With Castmagic, I can pull multiple title ideas and test them against my other workflow tools if I want. If you use software that scores title strength, having several options gives you flexibility instead of forcing a rewrite from scratch.
I see that as a practical SEO benefit, not just a convenience benefit.
Timestamps are one of the most annoying tasks to do by hand if you are trying to move fast. You have to scrub the video, mark each point, label it clearly, and format it correctly.
Castmagic takes a lot of that pain away.
After refining the prompt with the right keyword context, I can rerun the content and get timestamp suggestions that are already structured for me. That is huge if your videos follow a clear teaching format, tutorial flow, or review structure.
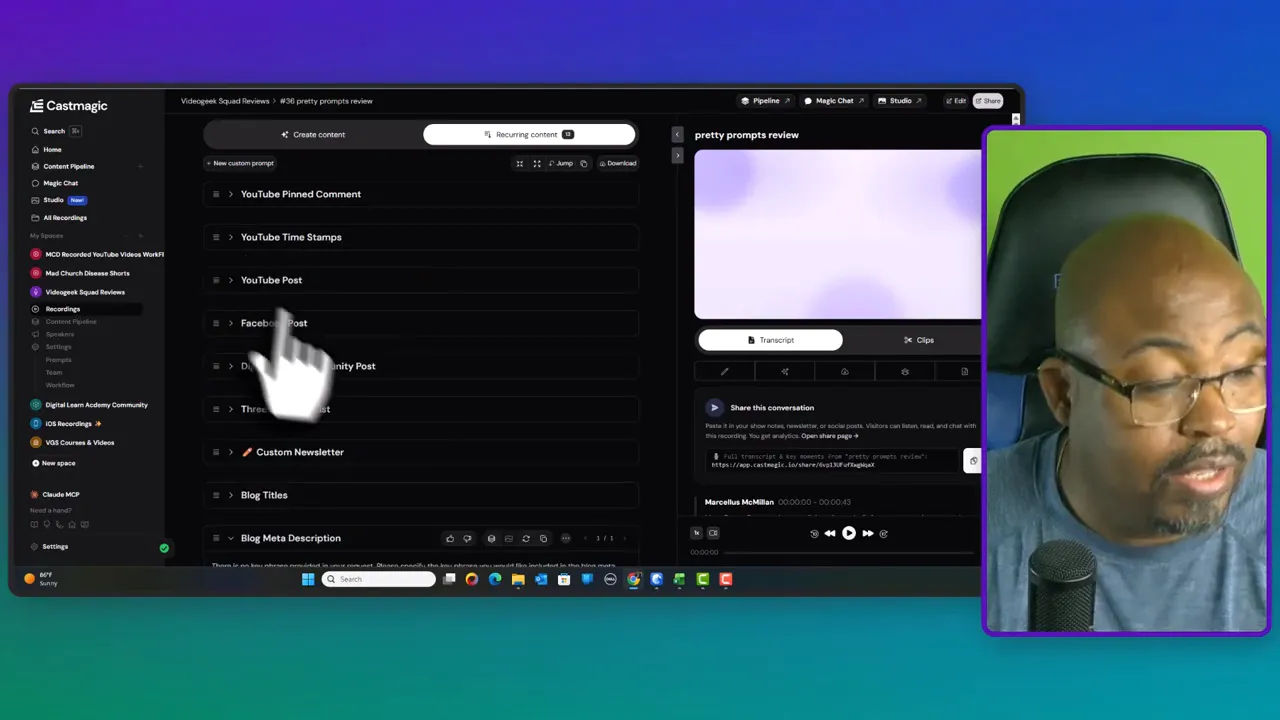
I still read through them, of course. I want the wording to be clear and useful. But getting a strong draft instantly is a major time saver.
For educational content, timestamps also help with:
Better navigation
Clearer structure
Improved user experience
Cleaner video documentation
Another reason I keep using Castmagic is that it goes beyond YouTube metadata.
It can also generate supporting content for places like:
YouTube community posts
Facebook posts
Email copy
That is where this tool becomes more than a transcription app. It starts acting like a repurposing engine.
I especially like the flexibility around email copy. I prefer simpler emails for my audience, so I adjust the style to keep things clean and direct. I do not always want a bunch of emojis and hype language if I am sending a straightforward review update.
Castmagic gives me a draft I can simplify, trim, or expand depending on what I need.
|
This is really the whole point.
Once Castmagic has done its job, the rest of my publishing process becomes very simple. I am no longer sitting there writing everything manually from scratch. At that point, I am mostly:
Choosing the best title
Copying the description
Using the timestamp list
Uploading the caption file
Pulling post copy where needed
That is why I say this tool can help me go from recorded video to upload ready assets in less than an hour, depending on the file processing time and the platform upload itself.
That kind of speed changes how consistently you can publish.
And for anyone serious about YouTube, consistency is not just motivation. It is operations.
Castmagic is powerful, but I still think it works best when it is part of a complete publishing system.
For example, I still think about:
My keyword target
The content angle
My thumbnail strategy
The title I actually want to lead with
How the video fits into the rest of my channel
Automation is amazing, but it works best when it supports a clear strategy. Castmagic removes production friction. It does not replace knowing what kind of content you should be making.
That is why I like software like this. It helps me stay in creator mode longer and admin mode less.
My honest take is that Castmagic is one of the easiest workflow tools to understand and one of the most useful if you publish video content regularly.
What stands out to me most is this:
It is simple to use
It handles multiple outputs from one source file
It speeds up metadata creation
It gives me transcript and SRT exports
It supports repurposing, not just transcription
It reduces the friction between recording and publishing
That is a strong combination.
If your bottleneck is not recording the content but packaging it afterward, Castmagic can remove a lot of that resistance.
Is Castmagic only for YouTube?
No. I see Castmagic as useful for YouTube, podcasts, newsletters, and general content repurposing. It is especially strong when one recording needs to become several content assets.
Can Castmagic create captions?
Yes. I can export an SRT file, which is useful for captions and accessibility. That is one of the first things I download after checking the generated text.
Do I still need to edit the output from Castmagic?
Yes, and I think that is the smart way to use it. Castmagic gives me a fast first draft for titles, descriptions, timestamps, and posts, but I still review everything to make sure the keyword focus and wording fit my goals.
Does Castmagic help with SEO?
It helps by speeding up the creation of metadata such as titles, descriptions, keywords, and timestamps. That does not replace strategy, but it makes optimization much easier to execute consistently.
What is the biggest benefit of Castmagic in a real workflow?
For me, the biggest benefit is cutting down the post recording workload. Once my video is done, Castmagic helps turn the rest of the process into a mostly copy and paste workflow.
Castmagic is one of those tools that makes immediate sense the second you use it inside a real publishing routine. I record the video once, upload it, clean a few details, refine the keyword prompts, export what I need, and move on.
That is the kind of workflow support I want.
If you are tired of manually writing every title, every description, every timestamp, and every supporting post, Castmagic is absolutely worth a serious look. It is fast, practical, and built for the kind of repetitive work that slows content creators down.
And anytime software helps me spend less time on busywork and more time publishing, I pay attention.